
How To Install an East Detailing Steering Wheel Cover | The COMPLETE Guide
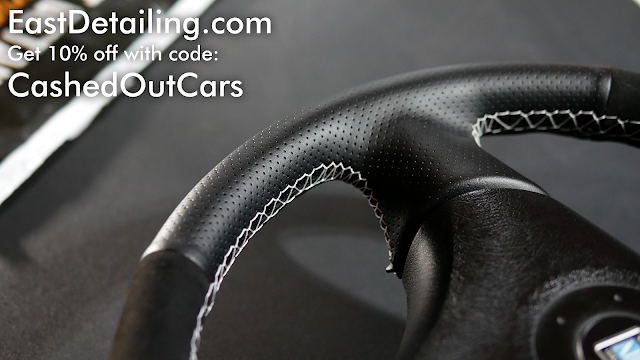
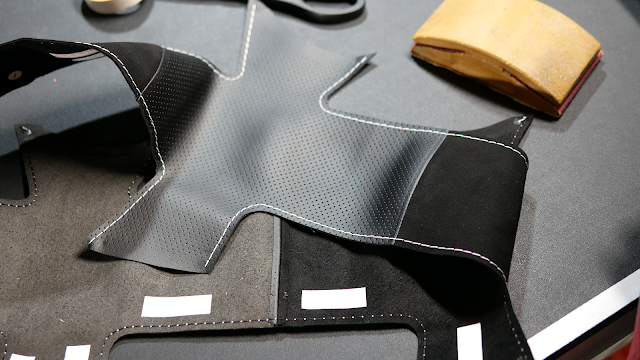
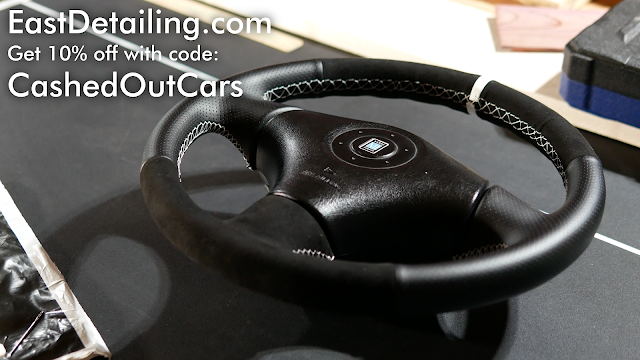
To start out, you’re probably asking: where can I get a steering wheel cover that’s custom to your car? I used a re-wrap kit from East Detailing. They’re one of a few companies that make high quality, customizable wheel wraps. I opted for black perforated material at the grips of the wheel and suede at the top and bottom. I also chose a white center stripe and white stitching. They create custom wraps for a wide range of vehicles, and it’s likely they make something for you. You can order a wrap at www.eastdetailing.com, and use coupon code “CashedOutCars” for 10% off your order!
Now to actually show you how to install a steering wheel wrap. This can be done either on or off your vehicle, but with this wheel I had it off.The first thing to do is prep the wheel. If your wheel is off, remove your airbag and trim, for easier access to the areas that we’ll be covering. Be careful doing this, and consult a professional if you have any questions about how to do this safely. I went ahead and cleaned my wheel with some isopropyl alcohol. This removes dirt, grease, and contaminants that would prevent the wrap from adhering properly. With this, the wheel is ready to be covered.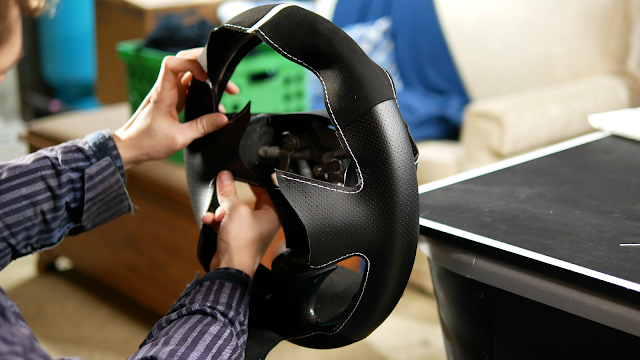
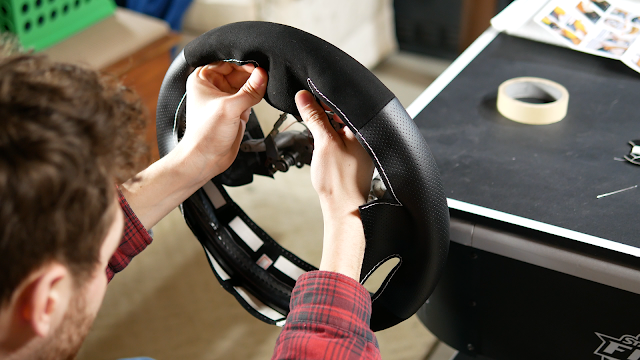
This East Detailing wrap kit came with all the components and tools needed to refinish the wheel. This included the steering wheel wrap itself, thread to sew it up, tape to hold everything in place, tools, and more. The first thing I did was stretch the new cover over the wheel. It may be tight, but it needs to be this way for a nice, clean, professional result. Once the cover was initially set on, I marked out the centers of the spokes of the cover against the centers of the spokes on the wheel, as a frame of reference. Then I removed the cover again.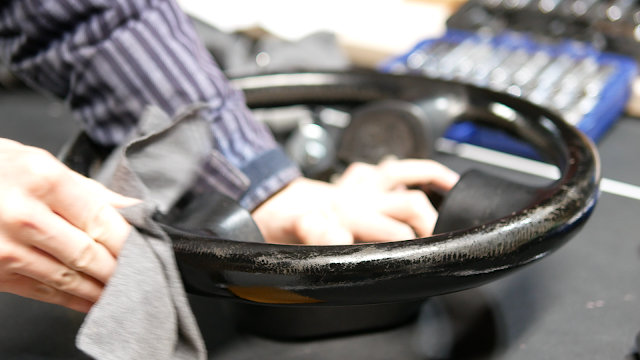
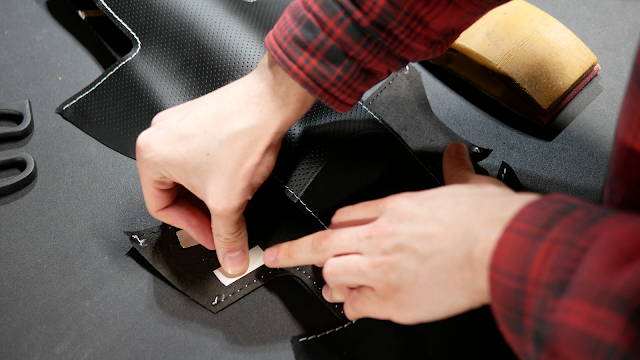
Next, I started applying 2 sided tape to the cover. This is what will hold the cover in place while stitching it up. It also prevents the cover from rotating and moving on the wheel during use. I used a generous amount of tape throughout the cover. Once it’s taped up, you can stretch your cover back on.
Once I had my cover in the position that I had marked out, I began to stick on the tape. I started at the spokes of the wheels, and positioned them as best as I could. For now, I only taped the spokes, and started to stitch up the wheel. You will tape the rest as you go.
To get a strong first stitch, I created a hole in the cover using a pin. Do this where you plan to start stitching. Then I ran the thread through from the backside with a large knot in it. This prevents the thread from pulling through, and prevents all your hard work from coming undone. As for thread length, you can estimate about 3 times the length of the area that you’re stitching. If you’re unsure, it’s better to start with too much than too little. Next, I looped back through the first stitches a few times to strengthen it up. Then it was time to REALLY get started stitching.
There are several ways to do this. I opted to start by going through EVERY stitch on the tight corners, for more pulling strength. This means a tighter wrap. When stitching, I tried to always pull the cover closed by hand, rather than by using the thread to pull the gap closed. This prevents pulling stitches out, and makes for a better looking and better fitting final product. The two sides of the cover should just barely touch each other, but not overlap.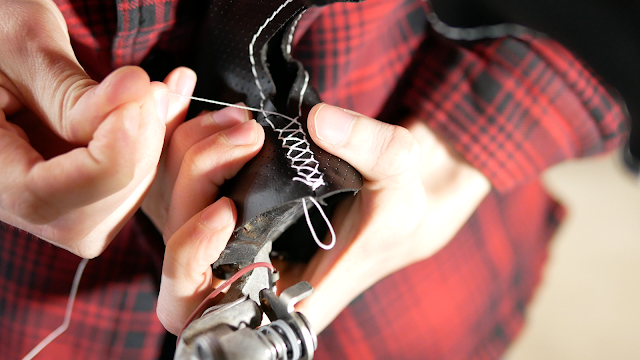
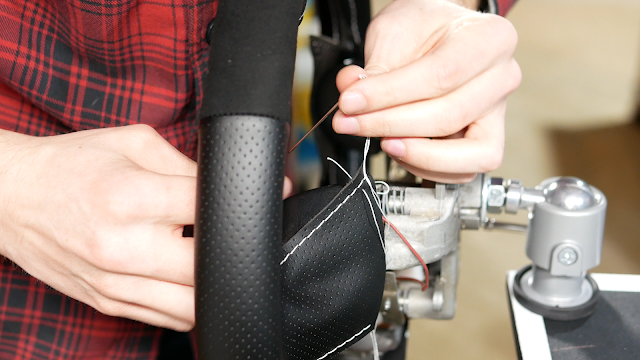
Once I was out of the tight curve, I started going every other stitch. This makes for a more open stitch pattern. It’s slightly less strong, but in an area like this it will be plenty. Of course, this is up to you and how you want your wheel to look!

When I was at the end of the section I could have finished it off, but I wanted to be 100% happy with it first. I went back through and tightened the stitches further, using the needle to pull the stitching closer together while manipulating the cover by hand. I did NOT finish off the thread yet. Before I did, I stitched the other sections of the wheel. Once complete, I then finished off the section, using the same technique as starting it.
At this point, the cover was complete. I went ahead and put my trim and the airbag back on, and this wheel was finished. And WOW. What a difference. Again, if you’d like to do this to your wheel, you can get these covers at www.eastdetailing.com, and use promo code “CashedOutCars” for 10% off your order. You can also watch a full installation video on my YouTube channel, CashedOutCars!
Note: All links or codes are affiliate links, which help support CashedOutCars by generating commission at NO cost to you!


Comments
Post a Comment